Centos7编译Clickhouse

参考 https://clickhouse.yandex/docs/en/development/build/

安装GCC7

查看现在的版本

1
2
3
4
5
[root@hadoop3 ~]# gcc --version
gcc (GCC) 4.8.5 20150623 (Red Hat 4.8.5-36)
Copyright (C) 2015 Free Software Foundation, Inc.
This is free software; see the source for copying conditions. There is NO
warranty; not even for MERCHANTABILITY or FITNESS FOR A PARTICULAR PURPOSE.

升级

1
2
3
4
5
6
7
8
9
10
cd /usr/local/src/
wget http://mirrors.ustc.edu.cn/gnu/gcc/gcc-9.2.0/gcc-9.2.0.tar.gz
tar zxvf gcc-9.2.0.tar.gz
cd gcc-9.2.0
./contrib/download_prerequisites
./configure --prefix=/opt/gcc9 --disable-multilib
yum install -y gcc-c++ #加上这行防止之后的编译出错
yum install -y texinfo #加上这行防止之后的编译出错
make -j4
make install

添加软链接

1
2
3
4
5
6
7
cd /opt/gcc9/bin/
ln -s gcc cc
ln -s g++ g++-9
ln -s gcc gcc-9
ln -s /opt/gcc9/bin/* /usr/local/bin/
rm -f /lib64/libstdc++.so.6
ln -s /opt/gcc9/lib64/libstdc++.so.6 /lib64/libstdc++.so.6

添加环境变量

1
2
3
4
5
6
vim /etc/profile
export GCC9_HOME=/opt/gcc9
export PATH=$GCC9_HOME/bin:$PATH
export CC=gcc-9
export CXX=g++-9
source /etc/profile

验证

1
2
3
4
5
[root@hadoop3 ~]# gcc --version
gcc (GCC) 9.2.0
Copyright (C) 2019 Free Software Foundation, Inc.
This is free software; see the source for copying conditions. There is NO
warranty; not even for MERCHANTABILITY or FITNESS FOR A PARTICULAR PURPOSE.

可能遇到的问题

1
/usr/local/src/gcc-9.2.0/missing: line 81: makeinfo: command not found

使用如下命令安装makeinfo

1
yum install texinfo

升级CMake3

查看现在的版本

1
2
[root@hadoop3 ~]# cmake --version
cmake version 2.8.12.2

准备安装包

1
2
3
4
wget https://cmake.org/files/v3.14/cmake-3.14.5-Linux-x86_64.tar.gz
tar zxvf cmake-3.14.5-Linux-x86_64.tar.gz -C /opt
cd /opt
ln -s cmake-3.14.5-Linux-x86_64 cmake

添加环境变量

1
2
3
4
vim /etc/profile
export CMAKE_HOME=/opt/cmake
export PATH=$CMAKE_HOME/bin:$PATH
source /etc/profile

验证

cmake --version

安装ninja

1
2
wget https://github.com/ninja-build/ninja/releases/download/v1.9.0/ninja-linux.zip
unzip ninja-linux.zip -d /usr/local/bin/

验证

ninja --version

编译ClickHouse

拉取ClickHouse源码

1
2
git clone --recursive https://github.com/yandex/ClickHouse.git
cd ClickHouse

开始编译

1
2
3
4
mkdir build
cd build
cmake ..
ninja clickhouse

使用Clickhouse

创建配置文件

1
2
3
mkdir /etc/clickhouse-server
cp /data/apps/ClickHouse/dbms/programs/server/config.xml /etc/clickhouse-server/
cp /data/apps/ClickHouse/dbms/programs/server/users.xml /etc/clickhouse-server/

启动server

server默认的tcp端口9000经常被占用,所以可以将/etc/clickhouse-server/config.xml中的<tcp_port>9000</tcp_port>改为tcp_port>9006</tcp_port>

1
/data/apps/ClickHouse/build/dbms/programs/clickhouse server  --config-file=/etc/clickhouse-server/config.xml

启动客户端

编译好的Clickhouse总的server端口默认是9000,我将端口改为9006了,所以以下命令指定端口为9006
https://clickhouse.yandex/docs/zh/interfaces/cli/

1
/data/apps/ClickHouse/build/dbms/programs/clickhouse client --port 9006

检查

1
2
3
4
5
6
7
8
9
10
11
12
13
14
15
16
17
create database app;
use app;

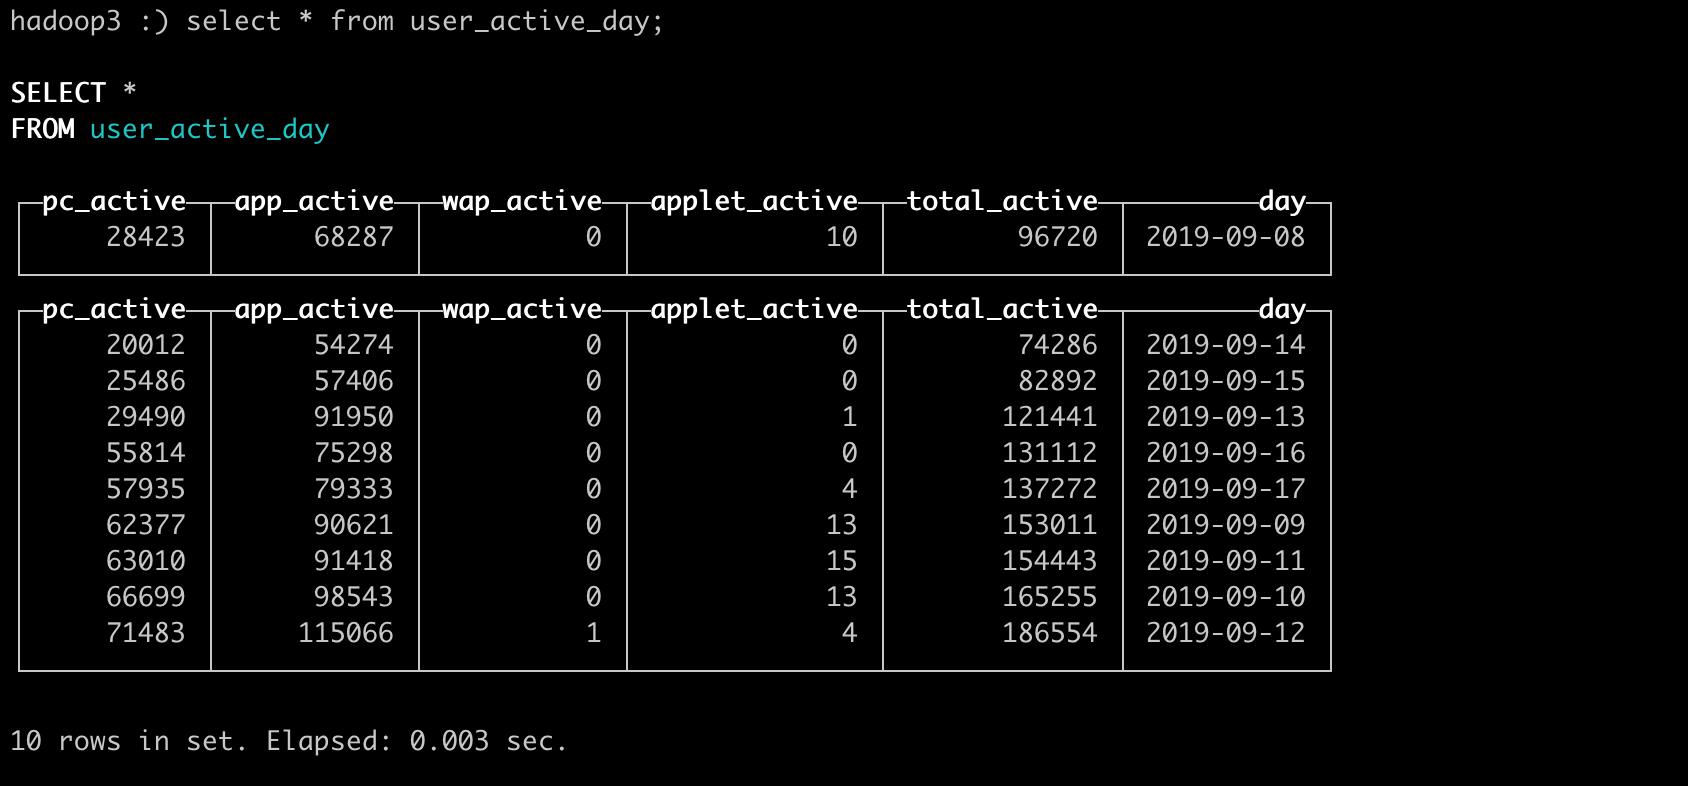
CREATE TABLE user_active_day (`pc_active` Nullable(Int32), `app_active` Nullable(Int32), `wap_active` Nullable(Int32), `applet_active` Nullable(Int32), `total_active` Nullable(Int32), `day` Nullable(Date)) ENGINE = MergeTree PARTITION BY ifNull(toYYYYMM(day), 1970 - 1) ORDER BY ifNull(pc_active, 0)

insert into user_active_day values(57935,79333,0,4,137272,'2019-09-17');
insert into user_active_day values(55814,75298,0,0,131112,'2019-09-16');
insert into user_active_day values(25486,57406,0,0,82892,'2019-09-15');
insert into user_active_day values(20012,54274,0,0,74286,'2019-09-14');
insert into user_active_day values(29490,91950,0,1,121441,'2019-09-13');
insert into user_active_day values(71483,115066,1,4,186554,'2019-09-12');
insert into user_active_day values(63010,91418,0,15,154443,'2019-09-11');
insert into user_active_day values(66699,98543,0,13,165255,'2019-09-10');
insert into user_active_day values(62377,90621,0,13,153011,'2019-09-09');
insert into user_active_day values(28423,68287,0,10,96720,'2019-09-08');

select * from user_active_day;

user_active_day

可能出现的问题

1. GLIBCXX_3.4.21问题

1
version `GLIBCXX_3.4.21' not found (required by ninja)

原因分析
虽然安装了Gcc9,但系统中的动态链接库没有替换,还是旧的
解决办法

1
2
3
4
5
[root@hadoop3 opt]# ninja
ninja: /lib64/libstdc++.so.6: version `GLIBCXX_3.4.21' not found (required by ninja)
ninja: /lib64/libstdc++.so.6: version `GLIBCXX_3.4.20' not found (required by ninja)
[root@hadoop3 build]# rm -f /lib64/libstdc++.so.6
[root@hadoop3 build]# ln -s /opt/gcc9/lib64/libstdc++.so.6 /lib64/libstdc++.so.6

2. 错误:expected ‘)’ before ‘PRIu64’

1
2
3
4
5
6
7
8
9
10
11
12
13
14
../contrib/libunwind/src/DwarfParser.hpp:661:68: 错误:expected ‘)’ before ‘PRIu64’
661 | "malformed DW_CFA_val_offset DWARF unwind, reg (%" PRIu64
| ^~~~~~
../contrib/libunwind/src/config.h:135:33: 附注:in definition of macro ‘_LIBUNWIND_LOG’
135 | fprintf(stderr, "libunwind: " msg "\n", __VA_ARGS__)
| ^~~
../contrib/libunwind/src/config.h:135:10: 附注:to match this ‘(’
135 | fprintf(stderr, "libunwind: " msg "\n", __VA_ARGS__)
| ^
../contrib/libunwind/src/DwarfParser.hpp:660:9: 附注:in expansion of macro ‘_LIBUNWIND_LOG’
660 | _LIBUNWIND_LOG(
| ^~~~~~~~~~~~~~
../contrib/libunwind/src/DwarfParser.hpp:767:73: 错误:expected ‘)’ before ‘PRIu64’
767 | _LIBUNWIND_LOG("malformed DW_CFA_offset DWARF unwind, reg (%" PRIu64

在../contrib/libunwind/src/DwarfParser.hpp文件中添加一行代码:

1
#define __STDC_FORMAT_MACROS

之后就可以编译了
参考 http://www.voidcn.com/article/p-zjeayvnv-mh.html

Share